Kubernetes is a tool used for container orchestration.
Kubernetes runs your workload by placing containers into Pods to run on Nodes. A node may be a physical or virtual machine running(server) in a cloud provider.
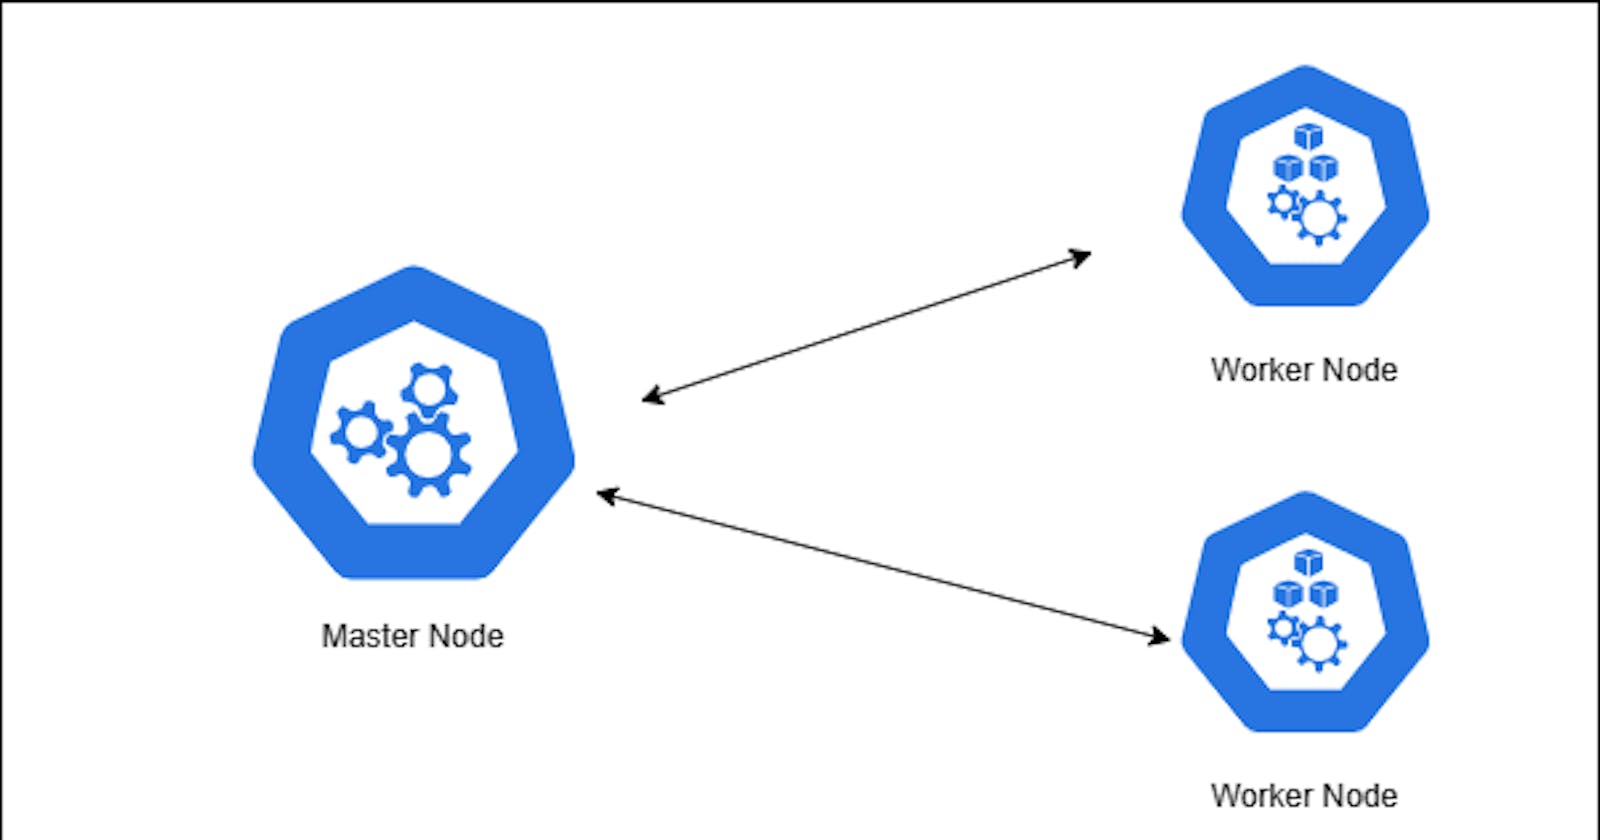
A master node is also a server that watches over the entire worker node and distributes the workload around the worker nodes in a cluster. The orchestration happens within the master node. The worker and master node together are what make up a Kubernetes cluster.
There is a component installed in the Master-node/control plane that makes it function as a master to the worker node.
In this article, we are going to install the master and worker nodes and ensure they work together as a cluster.
What do you need to get started?
minimum of two virtual machines running an ubuntu 18.04 Linux OS
2 GiB or more of RAM per machine--any less leaves little room for your apps.
At least 2 CPUs on the machine that you use as a control plane or master node.
Full network connectivity among all machines in the cluster. You can use either a public or a private network.
If you're running this cluster on a virtual machine in a cloud provider you need to allow inbound traffic through the following ports:
Kube-API-server port: 6443, ETCD store ports: 2379-2380
Kubelet: 10251 and Kube-control-manager: 10252
on the worker node:
Kubelet: 10251
Node-port services: 30000 - 32767
Steps to install Kubernetes on ubuntu 18.04
Update the package list with the command:
sudo apt-get updateDisable swap memory:
swapoff -aSet up the repository for Docker(containerd) installation:
sudo apt-get install apt-transport-https ca-certificates curl gnupg lsb-release.Add Docker’s official GPG key:
 sudo mkdir -m 0755 -p /etc/apt/keyrings
 curl -fsSL https://download.docker.com/linux/ubuntu/gpg | sudo gpg --dearmor -o /etc/apt/keyrings/docker.gpg
Use the following command to set up the repository:
 echo \
   "deb [arch=$(dpkg --print-architecture) signed-by=/etc/apt/keyrings/docker.gpg] https://download.docker.com/linux/ubuntu \
   $(lsb_release -cs) stable" | sudo tee /etc/apt/sources.list.d/docker.list > /dev/null
Update the apt package index:
sudo apt-get updateInstall containerd:
sudo apt install containerd.ioThis file is used for the configuration of older versions of ubuntu which is no longer supported by Kubernetes. You can also delete this file
comment out the disabled_plugins set for CRI
vi /etc/containerd/conf.tomlsudo systemctl restart containerd.service

Installing Kubernetes
Update the apt package index and install packages needed to use the Kubernetes apt repository.
sudo apt-get install -y apt-transport-https ca-certificates curlDownload the Google Cloud public signing key:
curl -s https://packages.cloud.google.com/apt/doc/apt-key.gpg | apt-key add -Add the Kubernetes APT repository:
echo "deb https://apt.kubernetes.io/ kubernetes-xenial main" | sudo tee /etc/apt/sources.list.d/kubernetes.listUpdate the APT package index, install kubelet, kubeadm and kubectl, and pin their version:
 sudo apt-get update
 sudo apt-get install -y kubelet kubeadm kubectl
 sudo apt-mark hold kubelet kubeadm kubectl
Kubelet is an agent that runs on each node. This is responsible for communications between the Kubernetes master node and the worker nodes.kubectl is a command-line tool that is used to manage Kubernetes clusters. It provides a command-line interface for performing common operations like creating and scaling Deployments.kubeadm helps install many components on the control plane.The /etc/sysctl.conf file is a configuration file that is used to modify kernel parameters in the Linux operating system. the modification will enable Kubernetes to run on the system.
 # To edit the file
 vi /etc/sysctl.conf
 # Enable Linux to read the configuration file changes
 sysctl -p
Uncomment this part of the file to look like the image below.

Use the modprobe command to add or remove modules on Linux. The command works intelligently and adds any dependent modules automatically.
 # This command requires sudo privilege or you can run it as a root.
 sudo modprobe br_netfilter
The sets of commands above used to install containerd, kubectl, kubelet and kubeadm should be run on every node that will be part of the Kubernetes cluster.
The next step is to configure the master node.
Initialize the control plane/master node with the kudeadm init.
You can use the CIDR block indicated here as long as it does not interfere with the private network of your server.
The IP address must be the private IP address of your instance or virtual machine on the master node.
kubeadm init --pod-network-cidr 10.244.0.0/16 --apiserver-advertise-address=172.31.12.30

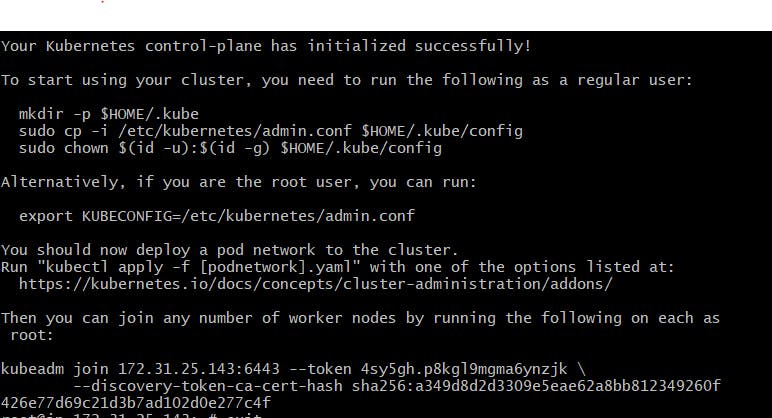
please take note of the above picture the code starting from the kudeadm join to the end of the third line is what you will use to connect the worker node to the master node. the command will be run on the worker node.
# Exit root user before you run the following commands
mkdir -p $HOME/.kube
sudo cp -i /etc/kubernetes/admin.conf $HOME/.kube/config
sudo chown $(id -u):$(id -g) $HOME/.kube/config
This command list the nodes in a cluster.
kubectl get nodes
The control node is not ready because we don't have a networking solution installed yet. Installing Weave Net as our networking solution will solve this problem. Weave Net will manage the networking in the cluster.
# Install Weave Net
kubectl apply -f https://github.com/weaveworks/weave/releases/download/v2.8.1/weave-daemonset-k8s.yaml
#List the necessary dependency as they start running on the control plane
kubectl get pods -n kube-system
kubectl get nodes
The master node show is ready now.
The next step is to configure the worker node.
Join the worker node to the master node/control plane. use the command similar to the picture below which will be given to you when you initialize kubeadm.

In conclusion, if you want to replicate this configuration on Ubuntu 22.04 I would advise you to follow this documentation [docker docs](Install Docker Engine on Ubuntu | Docker Documentation) and [kubernetes docs](Installing kubeadm | Kubernetes) then you can follow this article from where I edited the sysctl file (STEP 5).
I hope this tutorial was helpful. If you have any questions or feedback, please leave a comment below.

